

先决条件
- OpenAI API 密钥(在此处生成)或 Anthropic API 密钥(在此处生成)
- 在 LangSmith 中创建规则的权限(生成新的 Insights 报告所需)
- 在 LangSmith 中查看跟踪项目的权限(查看现有 Insights 报告所需)
生成您的第一个 Insights 报告
- 在左侧菜单中导航到 Tracing Projects 并选择跟踪项目。
- 单击右上角的 +New,然后单击 New Insights Report 以生成项目的新见解。
- 输入作业名称。
- 单击作业创建窗格右上角的 图标,将您的 OpenAI(或 Anthropic)API 密钥设置为工作区密钥。如果您的工作区已经设置了 OpenAI API 密钥,您可以跳过此步骤。
- 回答指导性问题以将您的 Insights 报告集中在您想要了解的智能体上,然后单击 Run job。
使用 OpenAI 模型生成 1,000 个线程的见解通常成本为 $1.00-$2.00,使用当前 Anthropic 模型成本为 $3.00-$4.00。成本随采样的线程数量和每个线程的大小而变化。
理解结果
作业完成后,您可以导航到 Insights 选项卡,在那里您将看到 Insights 报告表。每个报告都包含从跟踪项目的特定跟踪样本生成的见解。

顶级类别
您的跟踪会自动分组到代表数据中最广泛模式的顶级类别中。 分布条显示每个模式发生的频率,使您可以轻松发现发生频率高于或低于预期的行为。 每个类别都有一个简短的描述,并显示其包含的跟踪的聚合指标,包括:- 典型的跟踪统计信息(如错误率、延迟、成本)
- 来自评估器的反馈分数
- 作为作业一部分提取的属性
子类别
单击任何类别会显示子类别的细分,这为您提供了对该类别跟踪中交互模式的更细粒度理解。 在上面图示的 Chat Langchain 示例中,在”数据和检索”下有诸如”向量存储”和”数据摄取”之类的子类别。单个跟踪
您可以通过单击以查看跟踪表来查看分配给每个类别或子类别的跟踪。从那里,您可以单击任何跟踪以查看完整的对话详细信息。配置作业
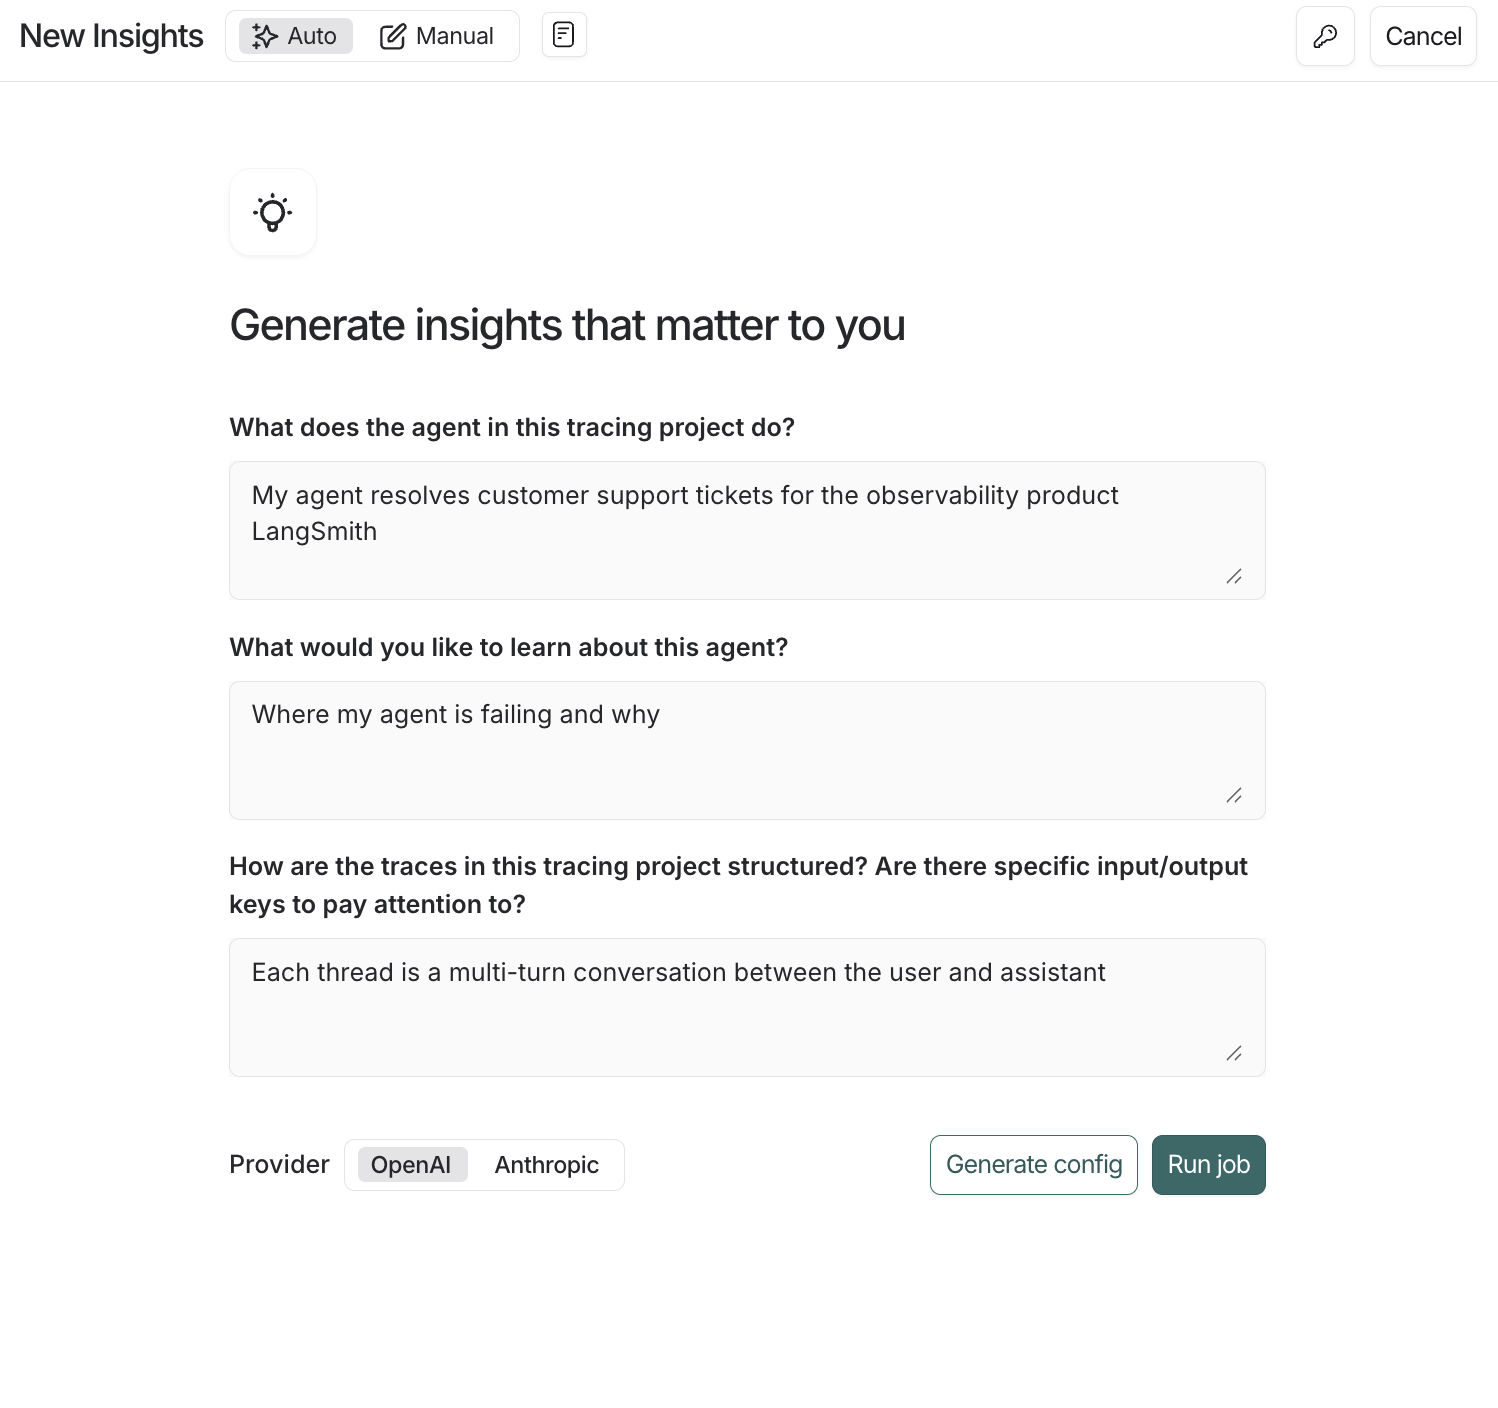
您可以通过三种方式创建 Insights 报告。从自动生成的流程开始以建立基线,然后在您完善时使用保存的或手动配置进行迭代。自动生成配置
- 打开 New Insights 并确保 Auto 切换处于活动状态。
- 回答关于智能体目的、您想了解什么以及跟踪的结构的自然语言问题。Insights 将把您的答案转换为 草稿配置(作业名称、摘要提示、属性和采样默认值)。
- 选择提供商,然后单击 Generate config 以预览或 Run job 以立即启动。
选择模型提供商
您可以选择 OpenAI 或 Anthropic 模型来驱动智能体。您必须为您选择的提供商设置相应的工作区密钥(OPENAI_API_KEY 或 ANTHROPIC_API_KEY)。 请注意,使用当前的 Anthropic 模型成本约为使用 OpenAI 模型的 3 倍。使用预构建配置
使用 Saved configurations 下拉菜单加载常见作业的预设,如 Usage Patterns 或 Error Analysis。直接运行它们以快速开始,或在保存自定义版本之前调整过滤器、提示和提供商。要了解更多关于您可以自定义的内容,请阅读下面的部分。从头开始构建配置
当您需要更多控制时,构建自己的配置会有所帮助 — 例如,预定义您希望将数据分组到的类别或针对与特定反馈分数和过滤器匹配的跟踪。选择跟踪
- 样本大小:要分析的最大跟踪数。目前上限为 1,000
- 时间范围:从此时间范围采样跟踪
- 过滤器:其他跟踪过滤器。当您调整过滤器时,您将看到有多少跟踪符合您的条件
类别
默认情况下,顶级类别从底层跟踪自下而上自动生成。 在某些情况下,您事先知道您感兴趣的特定类别,并希望作业将跟踪放入这些预定义类别中。 配置的 Categories 部分允许您通过枚举您希望使用的顶级类别的名称和描述来执行此操作。 Subcategories are still auto-generated by the algorithm within the predefined top-level categories.Summary prompt
The first step of the job is to create a brief summary of every trace — it is these summaries that are then categorized. Extracting the right information in the summary is essential for getting useful categories. The prompt used to generate these summaries can be edited. The two things to think about when editing the prompt are:- Summarization instructions: Any information that isn’t in the trace summary won’t affect the categories that get generated, so make sure to provide clear instructions on what information is important to extract from each trace.
- Trace content: Use mustache formatting to specify which parts of each trace are passed to the summarizer. Large traces with lots of inputs and outputs can be expensive and noisy. Reducing the prompt to only include the most relevant parts of the trace can improve your results.
| Variable | Best for | Example |
|---|---|---|
| run.* | Access data from the most recent root run (i.e. final turn) in a thread | {{run.inputs}} {{run.outputs}} {{run.error}} |
"Summarize this: {{run.inputs.foo.bar}}" will include only the “bar” value within the “foo” value of the last run’s inputs.
Attributes
Along with a summary, you can define additional categorical, numerical, and boolean attributes to be extracted from each trace. These attributes will influence the categorization step — traces with similar attribute values will tend to be categorized together. You can also see aggregations of these attributes per category. As an example, you might want to extract the attributeuser_satisfied: boolean from each trace to steer the algorithm towards categories that split up positive and negative user experiences, and to see the average user satisfaction per category.
Filter attributes
You can use thefilter_by parameter on boolean attributes to pre-filter traces before generating insights. When enabled, only traces where the attribute evaluates to true are included in the analysis.
This is useful when you want to focus your Insights Report on a specific subset of traces—for example, only analyzing errors, only examining English-language conversations, or only including traces that meet certain quality criteria.

- Add
"filter_by": trueto any boolean attribute when creating a config for the Insights Agent - The LLM evaluates each trace against the attribute description during summarization
- Traces where the attribute is
falseor missing are excluded before insights are generated