本指南将引导您了解如何使用 Studio 在本地可视化、交互和调试您的智能体。
Studio 是我们免费使用的强大智能体 IDE,与 LangSmith 集成以启用跟踪、评估和提示工程。准确查看您的智能体如何思考,跟踪每个决策,并交付更智能、更可靠的智能体。
前提条件
在开始之前,请确保您具备以下条件:
设置本地 Agent server
1. 安装 LangGraph CLI
# Python >= 3.11 is required.
pip install --upgrade "langgraph-cli[inmem]"
2. 准备您的智能体
我们将使用以下简单的智能体作为示例:
from langchain.agents import create_agent

def send_email(to: str, subject: str, body: str):
    """发送电子邮件"""
    email = {
        "to": to,
        "subject": subject,
        "body": body
    }
    # ... 电子邮件发送逻辑

    return f"Email sent to {to}"

agent = create_agent(
    "gpt-4o",
    tools=[send_email],
    system_prompt="You are an email assistant. Always use the send_email tool.",
)
3. 环境变量
在项目根目录中创建 .env 文件并填写必要的 API 密钥。我们需要将 LANGSMITH_API_KEY 环境变量设置为从 LangSmith 获取的 API 密钥。
请确保不要将您的 .env 提交到版本控制系统(如 Git)!
LANGSMITH_API_KEY=lsv2...
4. 创建 LangGraph 配置文件
在应用程序的目录中,创建配置文件 langgraph.json:
{
  "dependencies": ["."],
  "graphs": {
    "agent": "./src/agent.py:agent"
  },
  "env": ".env"
}
create_agent automatically returns a compiled LangGraph graph that we can pass to the graphs key in our configuration file.
到目前为止,我们的项目结构如下所示:
my-app/
├── src
│   └── agent.py
├── .env
└── langgraph.json
5. 安装依赖项
在新 LangGraph 应用程序的根目录中,安装依赖项:
6. 在 Studio 中查看您的智能体
启动您的 Agent server:
Safari blocks localhost connections to Studio. To work around this, run the above command with --tunnel to access Studio via a secure tunnel.
http://127.0.0.1:2024) and the Studio UI https://smith.langchain.com/studio/?baseUrl=http://127.0.0.1:2024:
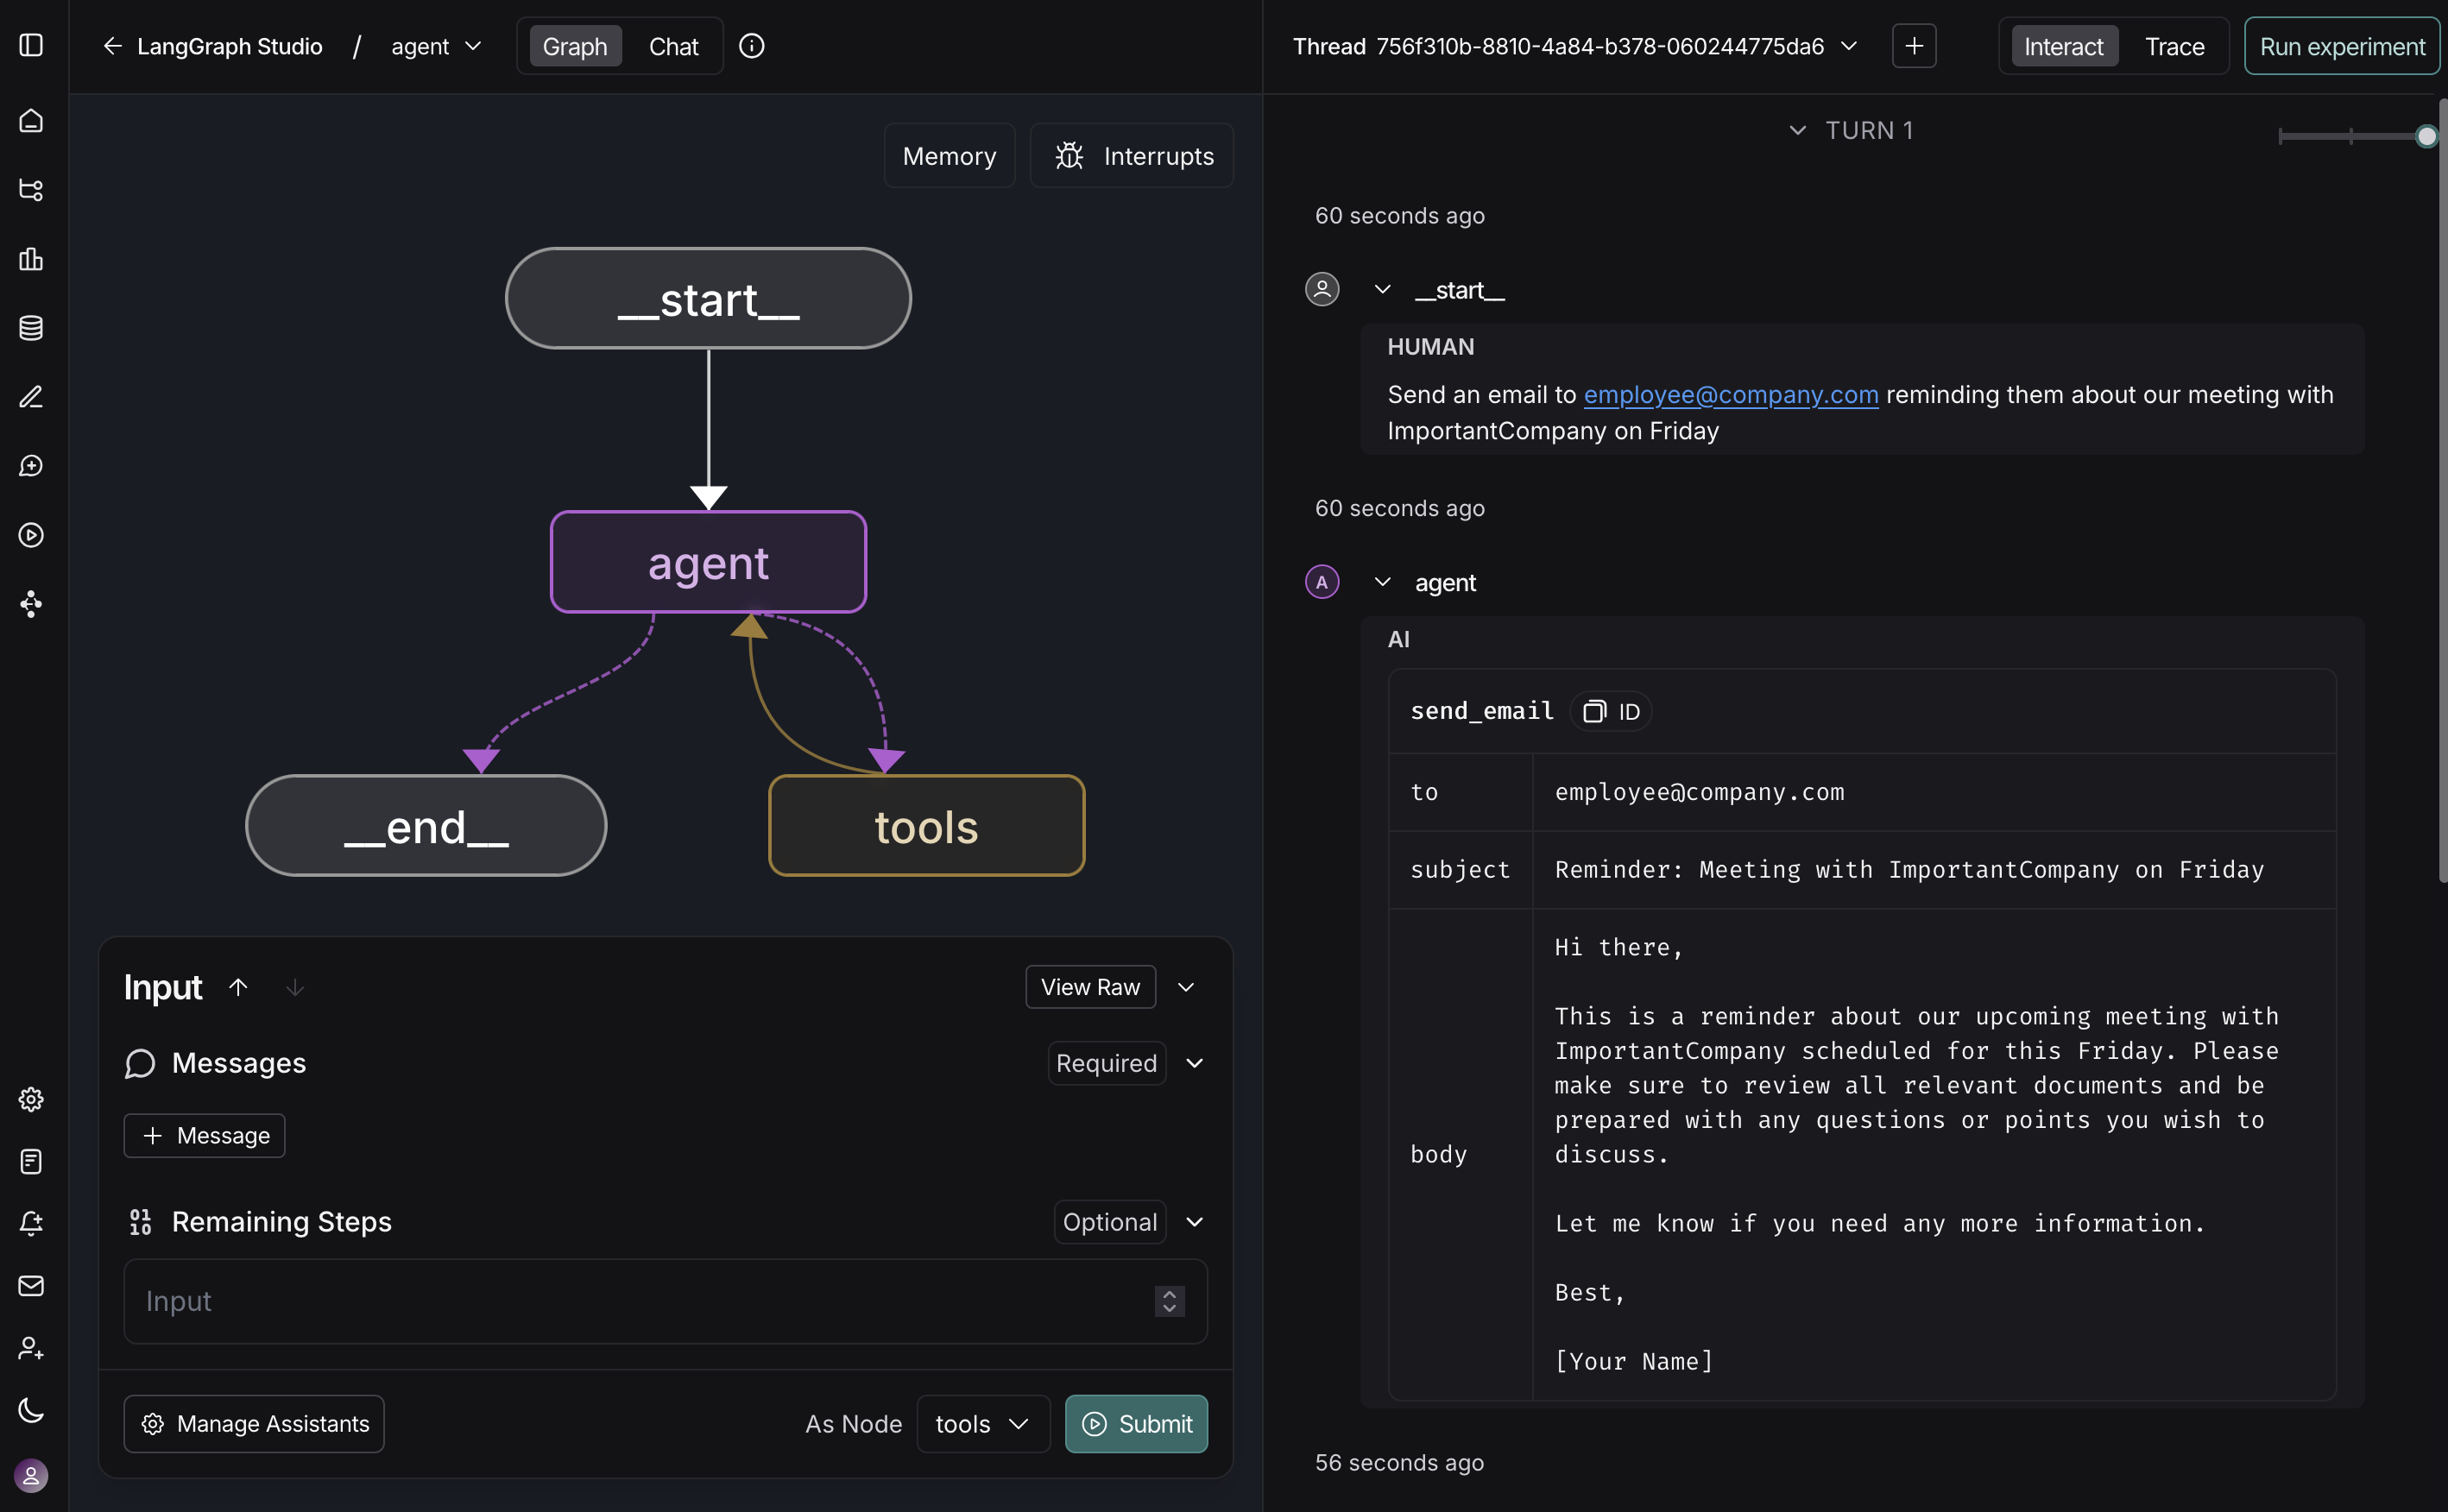
Studio 使智能体的每个步骤都易于观察。重放任何输入并检查确切的提示、工具参数、返回值以及令牌/延迟指标。如果工具抛出异常,Studio 会记录它及其周围状态,以便您可以花费更少的时间调试。
保持开发服务器运行,编辑提示或工具签名,并观察 Studio 热重载。从任何步骤重新运行对话线程以验证行为更改。有关更多详细信息,请参阅管理线程。
随着智能体的增长,相同的视图可从单工具演示扩展到多节点图,保持决策清晰且可重现。